

Uploading Ads (1)
Bench Connect makes it easy to manage your cross channel ads in a centralised location. The platform provides ways to quickly upload ads per spec. You can review and modify the ads along with live previews. Once the ads are ready and approved, you can traffic them to ad platforms just as easily using our ad trafficking tools.
Navigation and filtering
To get started, navigate to the ‘Ads’ tab of your campaign.
At the top of the ads tab, there are options to search and filter ads
a. Search - Enter any text from the ad copy, all matching ads will be listed.
b. Promos / Message - Select the promos and/or messages you want to see ads for.
c. Sort - You can sort the ads by time first created, last modified or alphabetically by ad version name.
You can view more sorting options by clicking on the 'More' link.
a. More filtering options: Layers, Channel, Audiences, Labels, Status, Show Archived.
If you want to remove any filter click on the 'x' shown next to the selected option.
How to upload one ad at a time
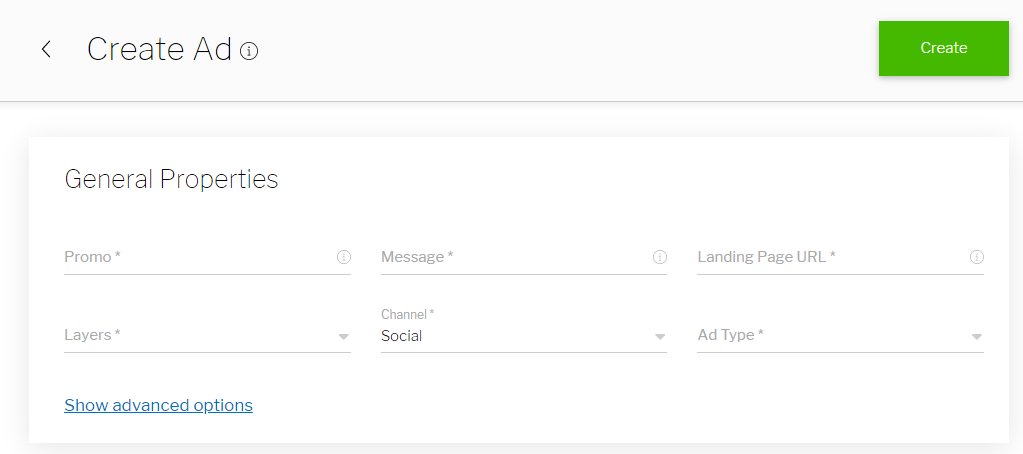
Within the ‘Ads’ tab of your campaign, Click ‘Create > Create New Ad'.
In the ‘General’ section of the ad form, fill in the following required fields
a. Promo - Enter the category for the ad.
b. Message - Enter the message the ad conveys.
c. Landing Page URL - The web page where people are directed to when they click the ad.
d. Layers - Select the layers (stages of the funnel) this ad will be available.
e. Channel - Select the channel for this ad.
f. Ad Type - Based on your selection for Channel, you can choose from a subset of Ad Types for that Channel. Choose the Ad Type you wish to create.
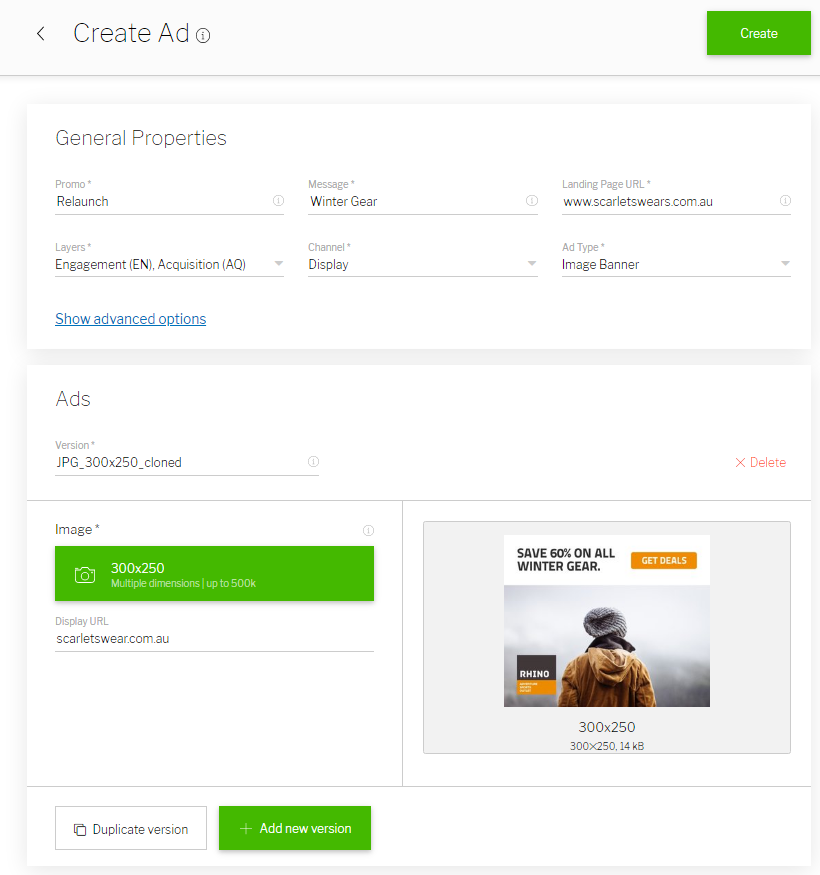
Once you have filled in the above fields, an ad details section will open up. In this form, fill in the required fields.
Version - Enter the ad version name.
There will be additional fields in the ad details section depending on the ad type selected. Please see Ad Specifications for more information on all ad types available in Bench Connect.
Use the live ad preview to finalise your ad copy.
Click ‘Create’ to create your ad.

Uploading Ads (2)
How to upload ads in bulk
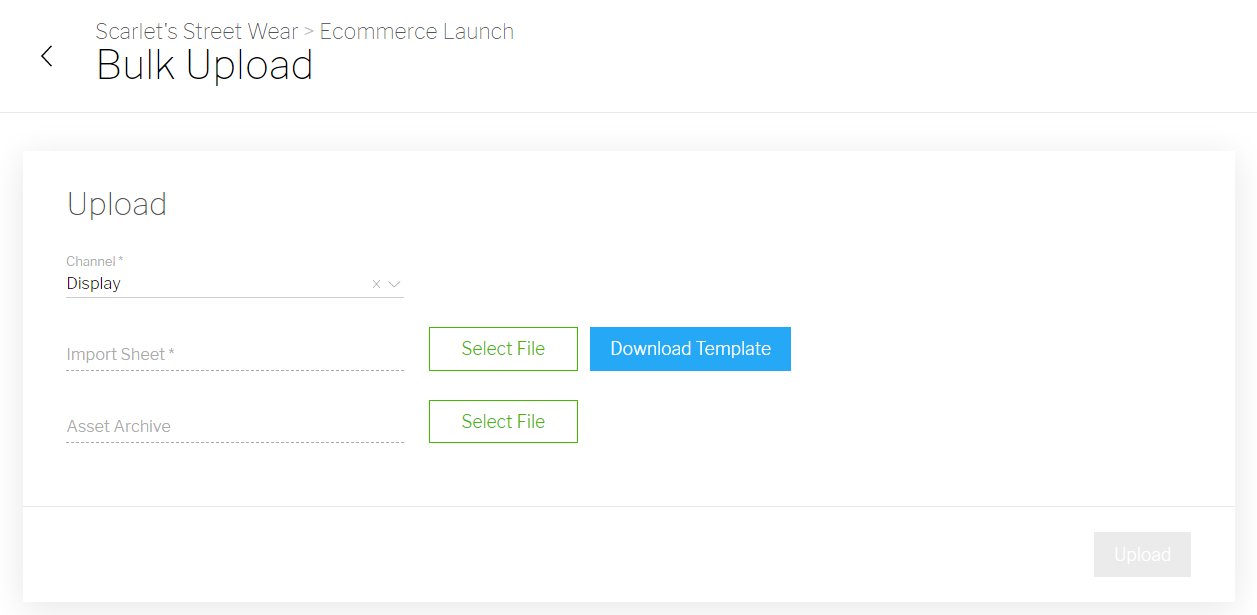
Within the ‘Ads’ tab of your campaign, Click ‘Create > Bulk Upload'.
In the next screen, choose the Channel for the new ads.
After selecting the Channel, click on ‘Download Template’ to download a sample file for uploading ads. Each channel has its own ad upload template.
In the downloaded file, fill in information only for the relevant columns for the ad type in each row. Refer to the Ad Specifications for more details.
After entering required fields for all ads in the file, save the file and close it.
Go back to Bench Connect’s Ad Bulk Upload screen. Click on ‘Select File’ next to Import Sheet and select the file you just saved with the ads information.
Click on ‘Select File’ next to Asset Archive and select the archive file that contains assets for all the ads added in the first template file.
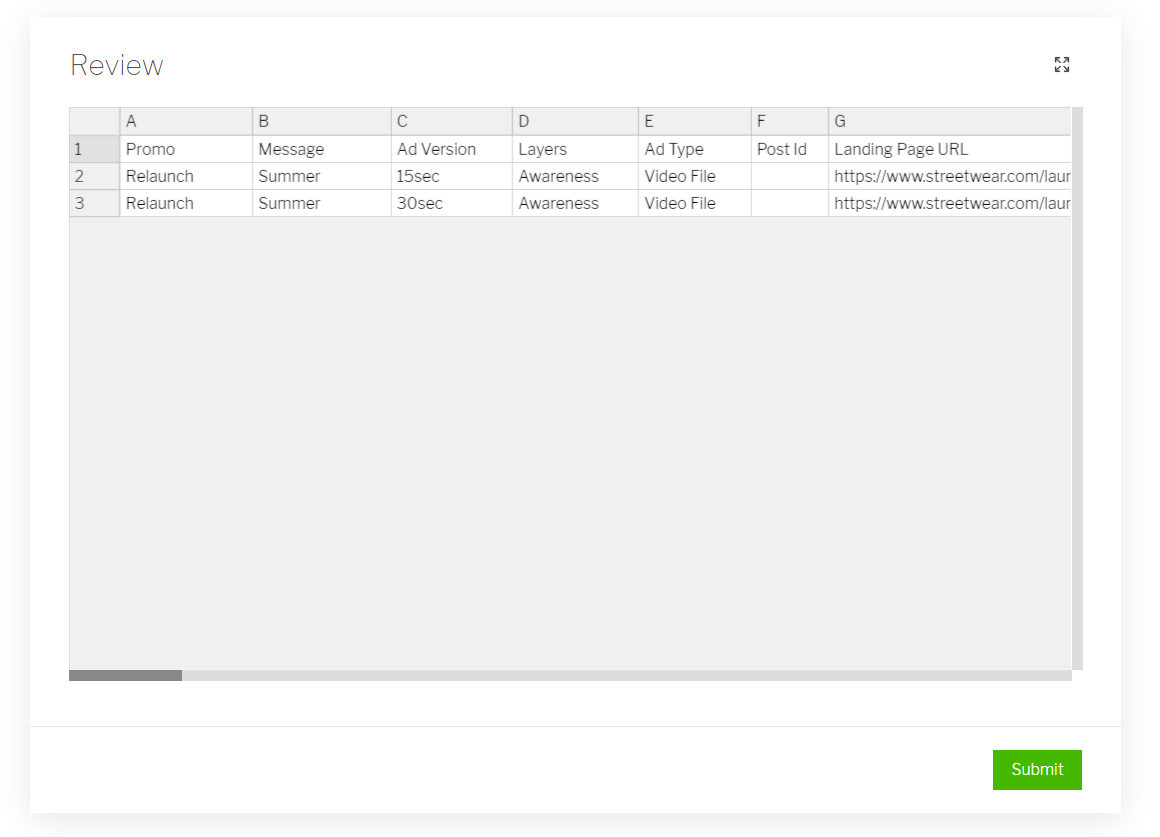
Click ‘Upload’ to process the Import Sheet. The platform will then preview your mapping sheet. You can review and make changes before creating the ads.
Click ‘Submit’ to create your ads. Your ads are now created and accessible from the ads tab within your campaign.


